Filed under: Developer Tools · macOS · Open Source
Why bother
Most of the documentation I write is screenshots with arrows on them. Runbooks, onboarding guides, “click here, then here” walkthroughs for a portal nobody reads the README for. The writing is the easy part. The capturing is where the afternoon goes.
The loop is always the same. Capture, open an editor, draw a box, add a number, export, rename the file, drop it in the doc. Thirty times. Then the UI ships a redesign and you do all thirty again.
SnagIt has been the default answer for this for years, and it’s good. I just wanted a few things it doesn’t do the way I work:
- One shortcut to capture anything, and no dialog boxes after.
- Every capture kept and still editable, so going back to fix step 7 doesn’t mean redrawing it.
- A command line, so scripts can capture and annotate. And, increasingly, so an AI agent can.
- Open source, native on the Mac, no subscription.
So I built it. It’s called RasterNest, it’s MIT licensed, and it’s at version 0.4 as I write this.
What it does
Capture
Press ⌃⇧C and the screen freezes. Hover a window and it highlights, click to capture the whole window even if something is covering part of it. Drag to grab an area. Space takes the full display. There’s a pixel magnifier and a live size readout while you drag, and after you let go the selection stays adjustable: drag the handles or nudge it with the arrow keys, then hit Return.
The freeze matters more than it sounds. Menus, hover states and tooltips stay put while you frame the shot, which is exactly the stuff that disappears the moment you reach for a different shortcut.
Grab Text (⌃⇧T) is the same selection, but it runs OCR and puts the text on your clipboard instead of an image.
Mark it up
Arrow, line, rectangle, ellipse, highlighter, text and callouts, numbered steps, pixelate, spotlight, a magnifier lens, pen, crop. Every tool has a single-letter shortcut, and each one remembers its color and width between captures.
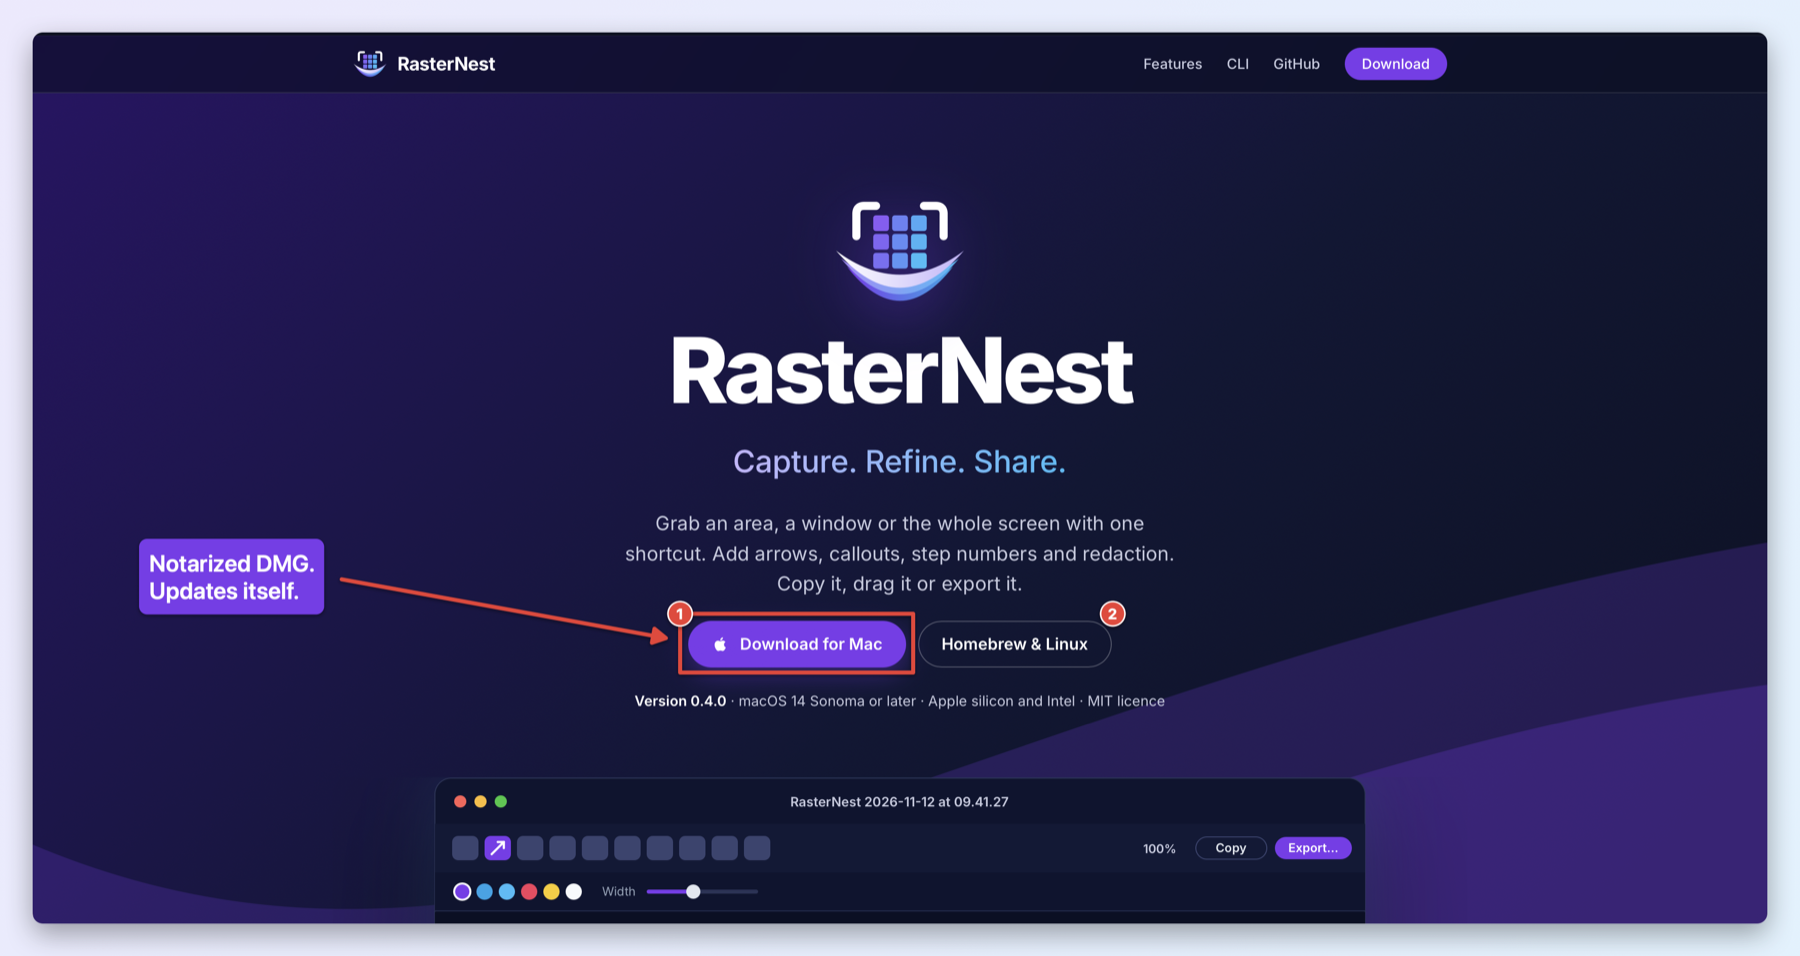
That’s a RasterNest capture of the RasterNest website, annotated in RasterNest, with the Docs frame applied. The frame is padding, a background, rounded corners and a shadow, and you can save one as the default so every screenshot in a doc looks the same without thinking about it.
One detail I’m glad got caught before it shipped: the magnifier lens enlarges what’s rendered underneath it, not the raw pixels. Put it over something you pixelated and you see the pixelation, not the thing you hid. An earlier build got that wrong, and a redaction tool that un-redacts is worse than no redaction tool.
One window, every capture
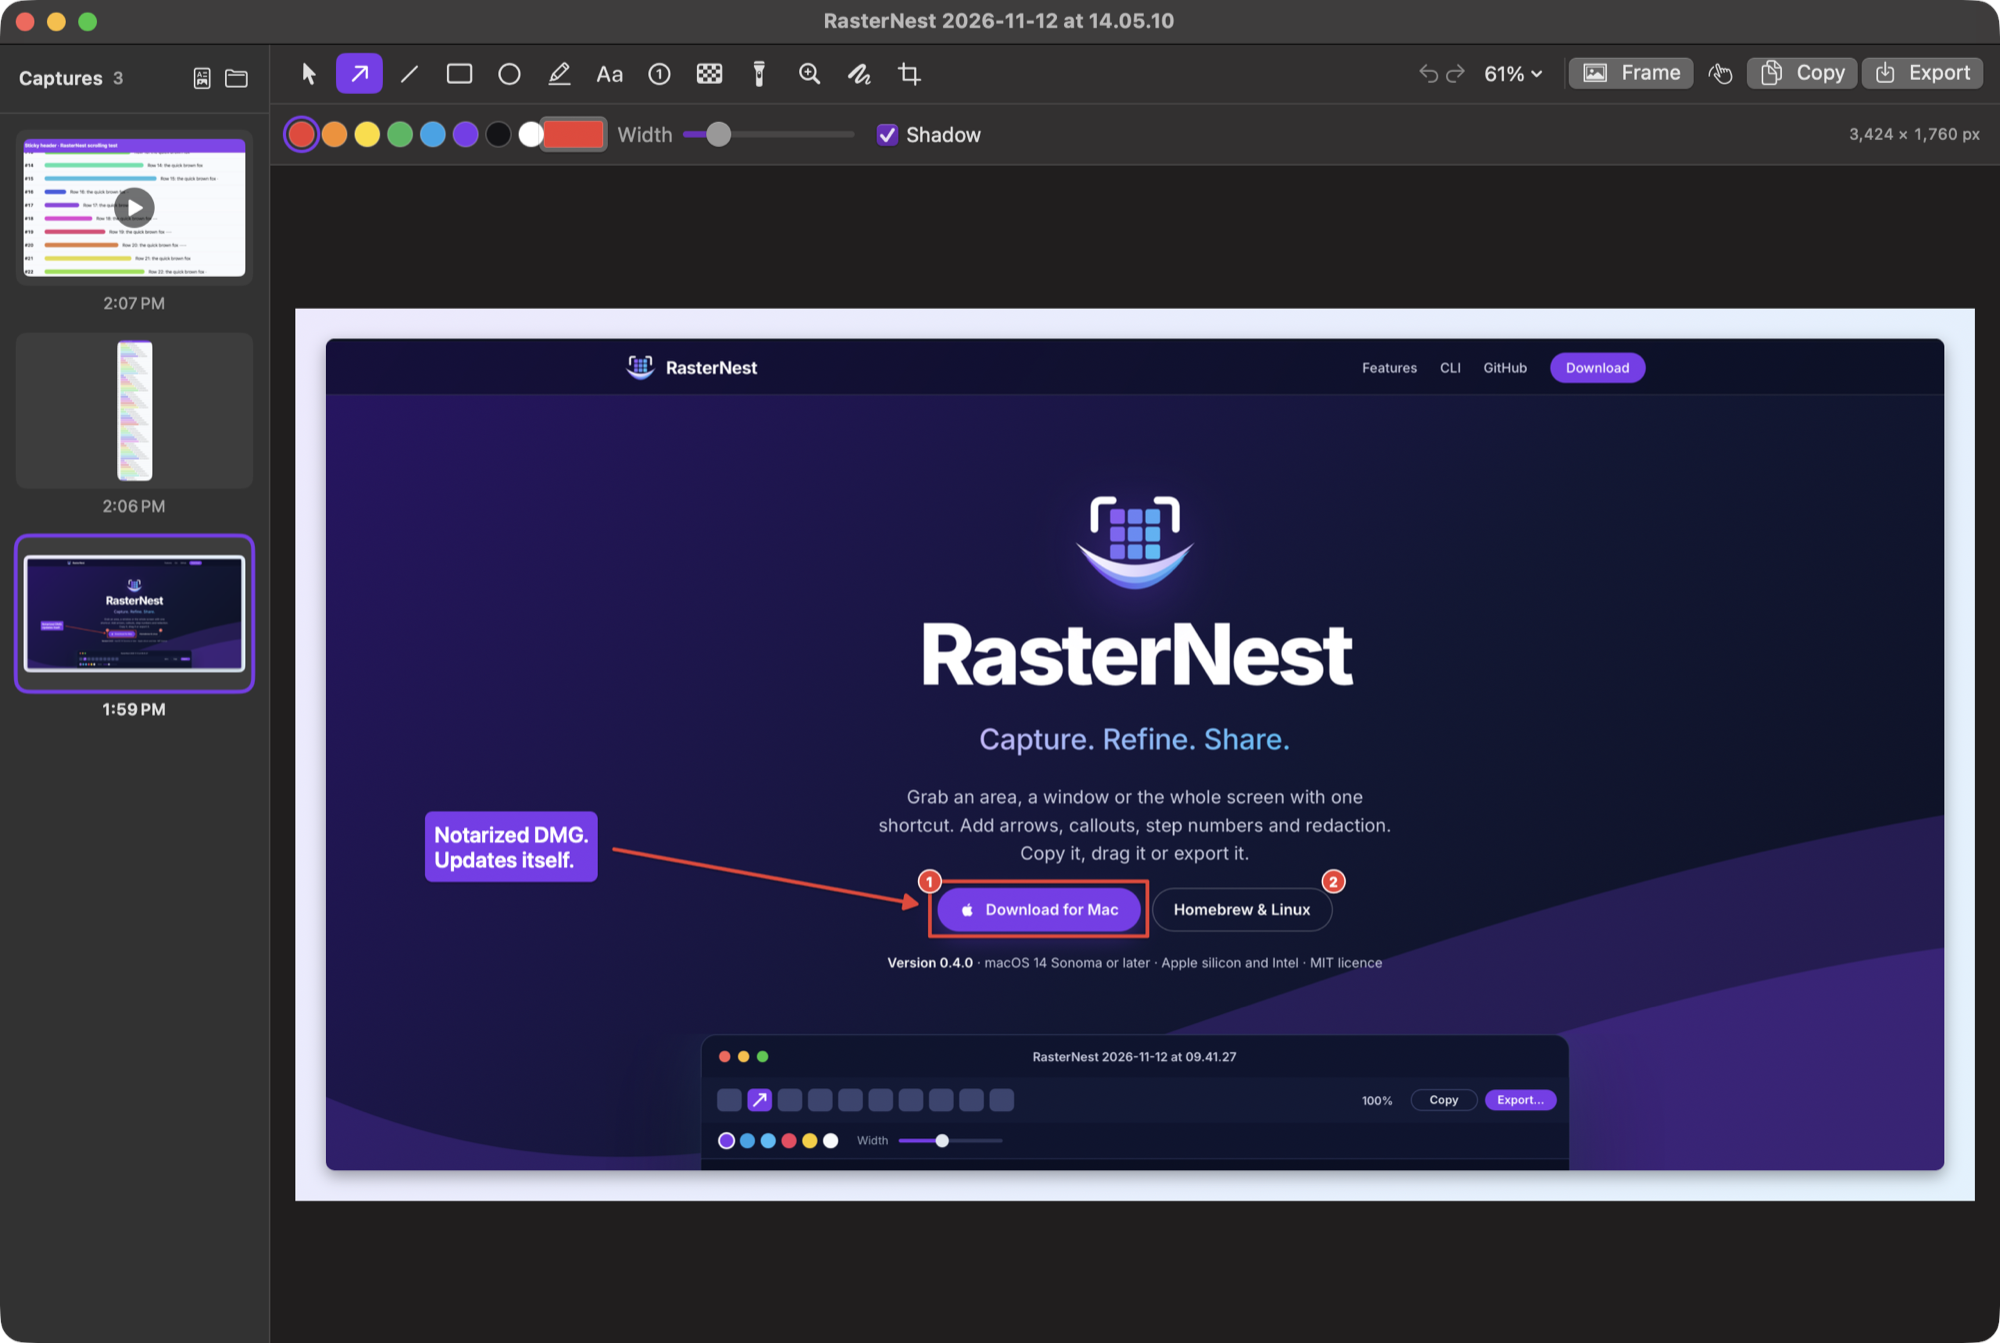
There’s one editor window. New captures land in it, and the strip down the left is everything you’ve taken, newest first. Click any of them to go back and change it. Drag a thumbnail straight into Slack or a doc.
Nothing asks you to save. Each capture lives in ~/Pictures/RasterNest as an editable .rasternest file plus a .png that gets re-rendered every time you edit. So the folder always has the current, annotated image sitting there, ready to drop into whatever you’re writing, and the original pixels are still underneath if you change your mind.
Scrolling capture
⌃⇧S, pick the part of the window that scrolls, and scroll. It records the area and stitches the frames together as you go.
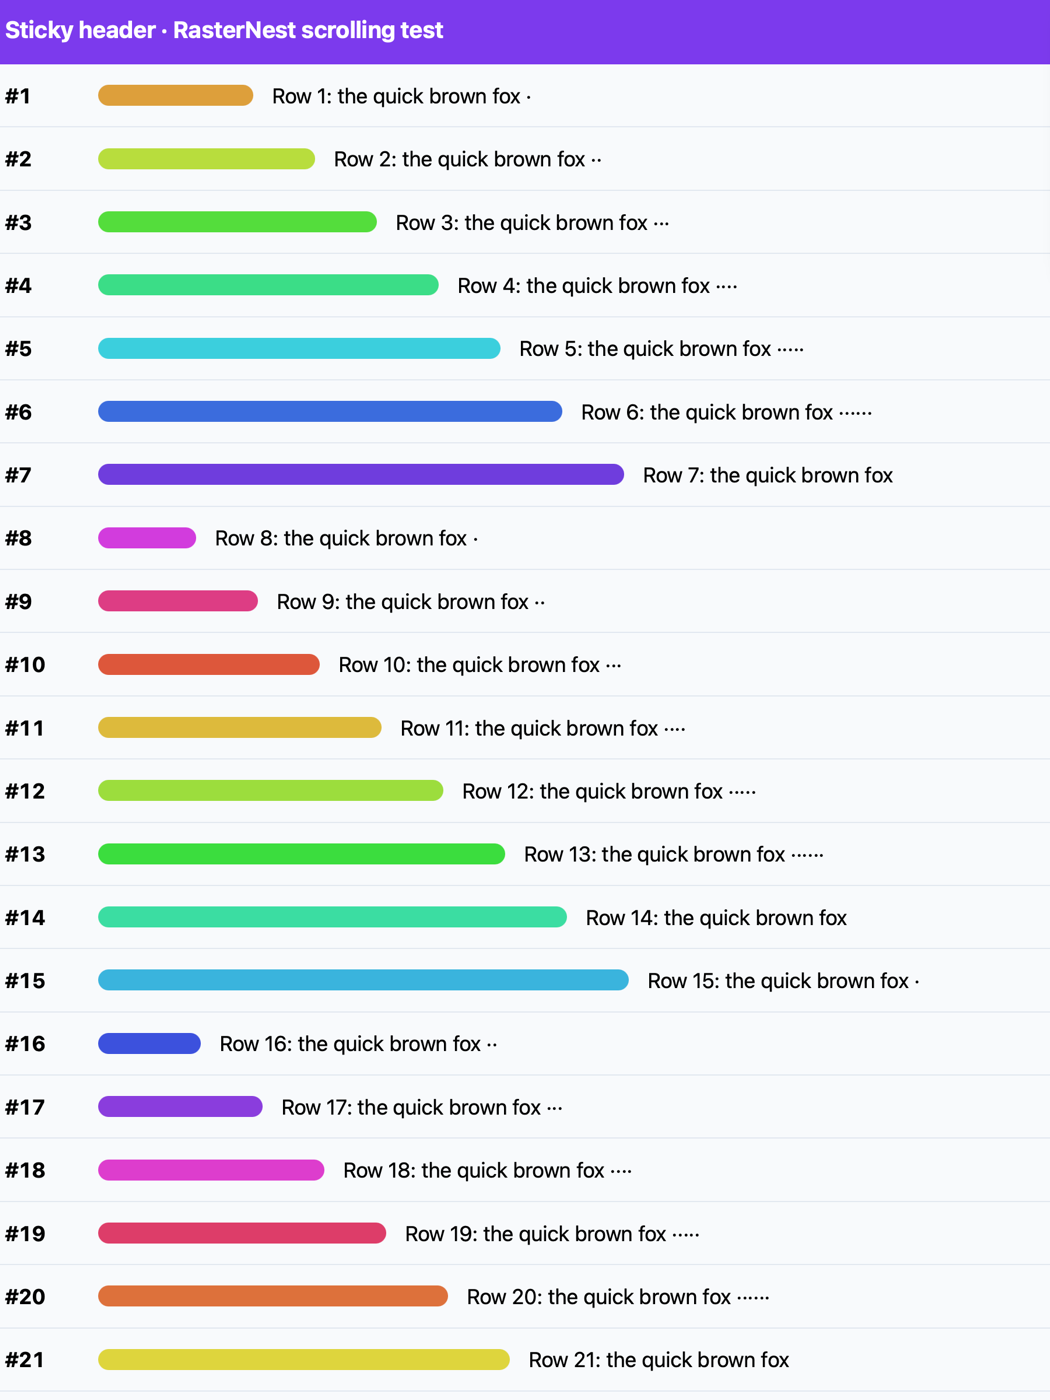
Cropped for the post. The full capture is 7,160 pixels tall, one image, no seams.
The stitching works on row fingerprints rather than raw pixels: each frame gets reduced to the average brightness of a few bands per row, and consecutive frames get compared to find exactly how far the content moved. Sticky headers get detected and kept once instead of repeating down the page, scrolling back up is ignored, and if you scroll too fast it tells you to slow down instead of handing you a broken image.
Recording
⌃⇧R records an area, a window or the whole screen to MP4, with system audio, the microphone and on-screen shortcuts if you want them. Recordings show up in the same strip, where you can trim them and export a GIF sized for a doc or a chat thread.
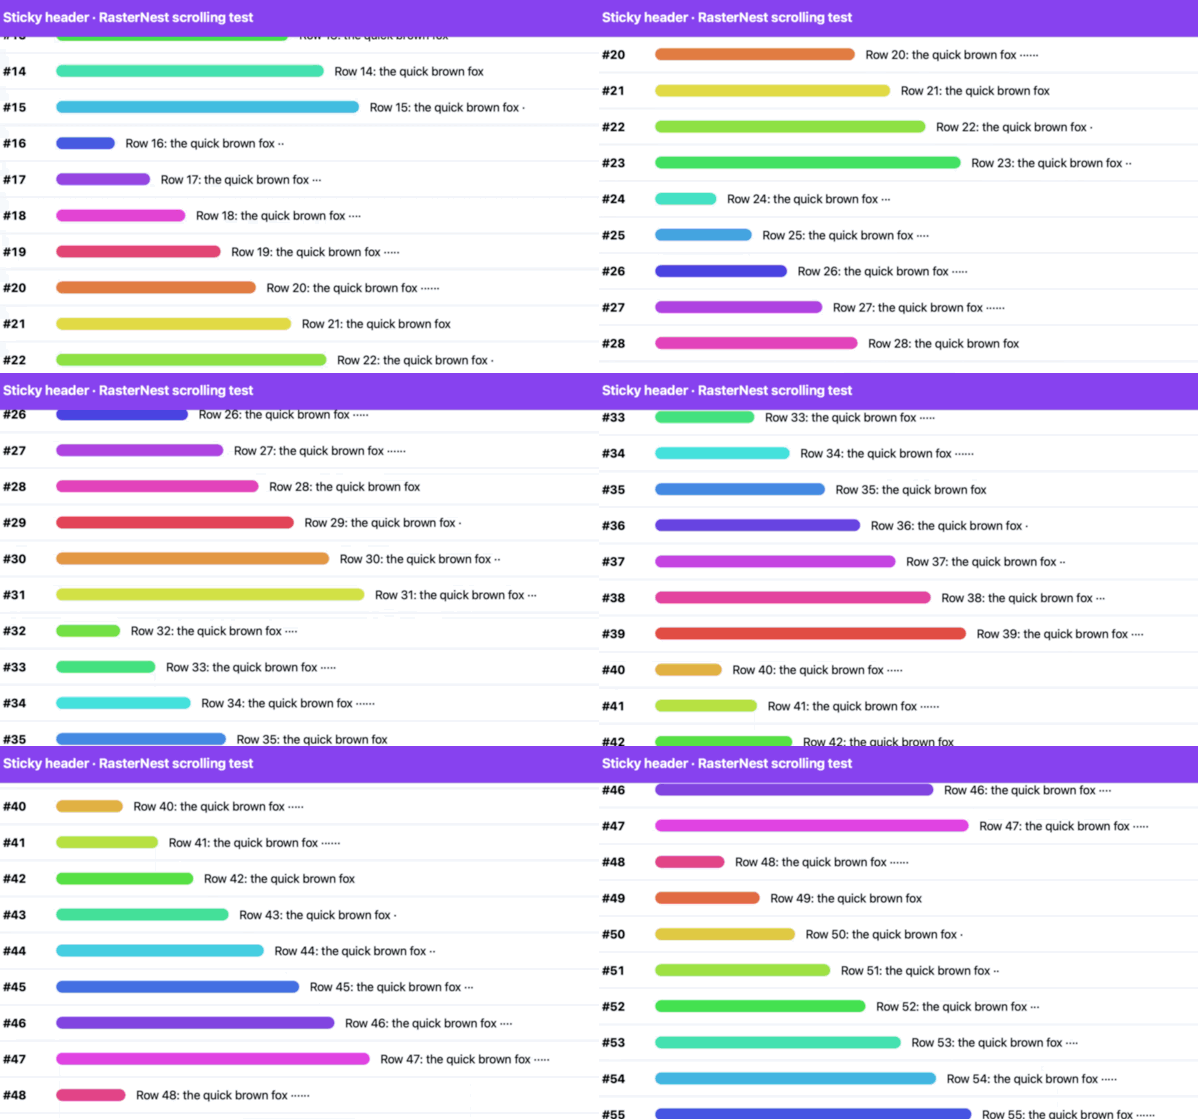
The keystroke overlay only shows shortcuts and special keys by default, never ordinary typing. The first time you record yourself typing a password into a demo, you’ll appreciate that.
PDFs
Pick a handful of captures, get one PDF back, one capture per page, oldest first so it reads like a guide. Letter, A4, or each page sized to its image.
The CLI
The app is the nice part. The CLI is the part that makes this interesting.
rnest capture --region                  # drag out an area
rnest capture --window -c               # click a window, copy it
rnest capture --fullscreen --delay 3    # whole display after 3 seconds
rnest ocr screenshot.png                # print the text in an image
rnest export notes.rasternest --format png
rnest export step1.rasternest step2.rasternest --format pdf --page-size letter -o guide.pdf
rnest export demo.mp4 --format gif --width 640
It also runs on Linux. Capture there goes through whatever screenshot tool you already have: grim and slurp on Wayland, maim, scrot or gnome-screenshot on X11. OCR uses tesseract. Rendering and export are still macOS-only for now.
The .rasternest format is plain JSON with the image embedded, which is the quiet reason the CLI matters. Anything that can write JSON can annotate a screenshot. Hold that thought.
The stuff nobody warns you about
The app itself came together fast. Shipping it properly took more time than any single feature. If you’re about to distribute a Mac app outside the App Store, here’s the toll.
Two kinds of signing certificate, and only one counts. An Apple Development certificate signs fine on your own machine. Downloaders need Developer ID Application plus notarization, or macOS greets them with a malware warning. Only the team’s Account Holder can create a Developer ID certificate, and Xcode will tell you that in an error dialog without telling you which Apple ID it thinks you are. Then, when you finally download the certificate and double-click it, Keychain Access tries to import it into your iCloud keychain and fails with error -25294. It goes in the login keychain. Nothing tells you this.
Screen Recording permission belongs to a signature, not an app. I switched the build from my development certificate to Developer ID and RasterNest started asking for Screen Recording permission on every capture, while the toggle in System Settings said it was already on. It was on, for the old signature. The fix was to remove the stale entry and grant it again, and the app now has a Reset Permission button for exactly that case. Stable signing from here on means it shouldn’t come back.
Homebrew changed the rules this year. Since Homebrew 6.0, third-party taps aren’t loaded until you trust them. So the install is two commands now, not one:
brew trust amineer/tap && brew install --cask amineer/tap/rasternest
The way around it is the official homebrew/cask repository, which has notability requirements a brand-new project doesn’t meet yet. Fair enough.
ScreenCaptureKit reuses a tiny pool of frame buffers. Hold on to the frames it gives you and the stream quietly stalls after a few. For scrolling capture that meant copying every frame, and copying only the rows each strip actually needs, or a long page eats gigabytes.
Even writing this post found a bug. The first scrolling capture I took for these screenshots had a faint dashed line through it. The border RasterNest draws around the capture area sat about three points outside it, and rounding put its edge inside the captured pixels. It’s ten points out now. Dogfooding is undefeated.
How it got built
I built RasterNest with Claude Code, in less than a day of elapsed time, from an empty folder to four releases. The repo, the brand, the website, the Homebrew tap, the signing and release pipeline, and every feature above.
My job was the product calls and the things only a person can do. The calls: the name, a CLI called rnest that also runs on Linux, Homebrew as an install path, one editor window with a strip of recent captures instead of a window per screenshot, recording to MP4 and GIF, the brand, and telling it the purple toolbar was too hard to read. The person-only things: creating the Developer ID certificate, typing passwords into prompts the agent never saw, entering GoDaddy’s SMS codes so the DNS could change, and approving every release. The agent didn’t get to make a repo public, store a secret, change DNS or publish a release without a yes from me, and it stopped and asked every time.
The part that surprised me was the testing. It didn’t just write the scrolling stitcher, it wrote a self-scrolling test page, recorded it through the app, opened the result, and found that its own crop command had been cutting from the middle of the image instead of the top. That’s the kind of thing I’d have shipped.
What’s next
The obvious next step is closing the loop I hinted at above: letting Claude write the documentation with RasterNest instead of me.
rnest ocr --jsonso an agent knows where “the Save button” actually is on screen.- An annotation spec, so “put step 1 on Save, arrow to Allow, redact anything that looks like an email” becomes a file, not pixel math.
- An MCP server, so Claude can capture, annotate and export directly.
rnest guide, a guide file that rebuilds every screenshot in a doc when the UI changes. That’s the one I actually want.
After that, Windows. Different signing story (Azure Artifact Signing, not Apple), same file format.
Try it
Download the notarized DMG from rasternest.app. It updates itself from 0.4 on. Or with Homebrew:
brew trust amineer/tap && brew install --cask amineer/tap/rasternest
Code’s here if it’s useful to you: github.com/AMineer/rasternest_app